Millers around the world are discovering how important proper maintenance is for their equipment. With just a few simple steps, you can make sure that your electric grain mill lasts longer and produces better results than ever before. Maintaining and cleaning an electric grain mill doesn’t have to be complicated or overwhelming; all it takes is some dedication and knowledge!
In this article we will provide step-by-step instructions on how to properly maintain and clean your electric grain mill. We’ll also discuss why these tasks are so important in order to get the best out of your machine. By following our advice, not only will you improve the quality of your final product but also extend the life span of your beloved appliance. So let’s dive right into it!
Clean With Coarse White Rice
Cleaning and maintaining your electric grain mill is essential to get the best results. If you want an easy, effective way to keep it running smoothly, then using coarse white rice is a great option. It’s simple: all you have to do is run the white rice through your grinder or flour mill for several minutes until no more comes out. This will help remove any residual flour that may be stuck in the machine from previous use. The result? A clean electric stone grain mill every time!
It’s fast and easy to clean your electrical appliance with coarse white rice – plus it’s cost-effective too! So why not give it a try next time you need to freshen up your equipment? You’ll be glad you did!
Unplug The Mill Before Cleaning
It is essential to maintain the safety of your electric grain mill and avoid potential hazards. According to research, a shocking 1 in 5 house fires start from electrical appliances that are not properly maintained or cared for. Therefore, it is important to unplug the mill before cleaning it. Here are five points on why this should be done:
- Unplugging will prevent any shocks or sudden surges of electricity while cleaning.
- It reduces the risk of electrocution when liquids come into contact with parts of the appliance which could potentially contain live wires.
- Unplugging prevents damage to other components within the machine if any part becomes wet during cleaning processes.
- If there were an accidental short circuit, unplugging ensures no further harm can take place as all power has been cut off.
- Finally, by unplugging, you create a safe environment around the mill and make sure nobody gets hurt in case something goes wrong during maintenance procedures.
Knowing these facts about why it’s necessary to disconnect your electric grain mill prior to performing any kind of maintenance work shows how important safety precautions are when dealing with electronic equipment. Taking time out now to carefully follow instructions can save trouble later – so don’t forget to unplug!
Open The Electric Grain Mill For Access
Opening your electric grain mill is a simple task that can be done in no time. Before doing so, it’s important to make sure you have all the necessary tools and safety precautions ready. First, unplug the machine from its power source and lay down some newspaper or cloth underneath to catch any spilled grains while cleaning.
Carefully lift off the hopper and set it aside. Once open, inspect the grinding chamber for dust buildup or other debris that needs to be removed. You may need a small brush or vacuum cleaner to clear away stubborn particles.
Finally, take note of any relevant pieces inside before taking them out one by one for thorough cleaning. With these steps completed, your electric grain mill will now run as good as new!
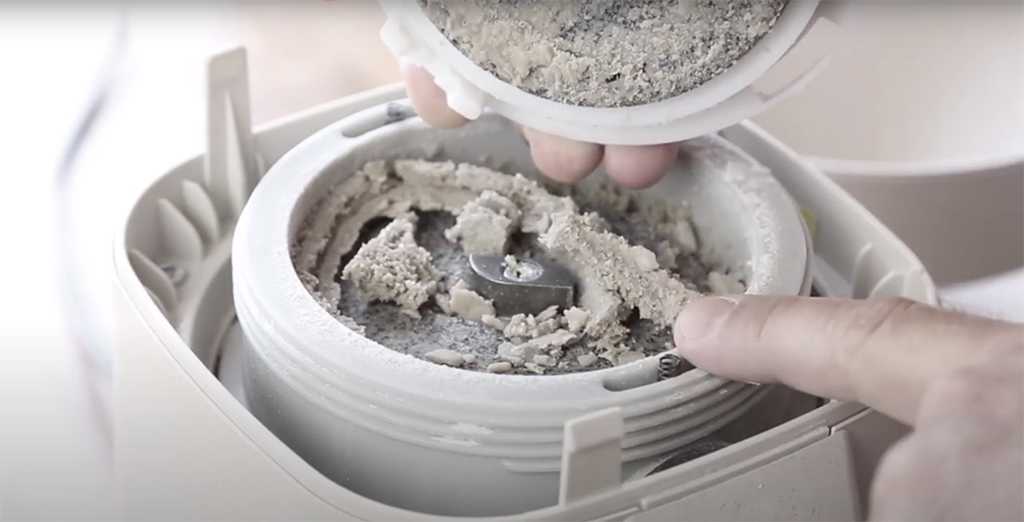
Clean The Grinding Stones
Cleaning your electric grain mill’s grinding stones is essential to keeping it in perfect working order. To do this, you’ll need to run rice through on a coarse to medium coarse setting a couple of times..
If any stubborn residue remains, use a brush or toothbrush to remove it gently. Be careful not to be overly abrasive as this could damage the stones’ surfaces. Wipe dry with a clean cloth.
When cleaning is complete, check for any signs of wear-and-tear such as chips or cracks in the stone material itself. If these issues exist, they should be tended to promptly so that your mill can continue operating smoothly. With regular maintenance and care, your electric grain mill will stay in top condition for years to come!
Reassemble Mill
Once you have finished cleaning the grinding stones, it is time to reassemble your electric grain mill Australia. This process does not need to be daunting; with a few simple steps and some patience, you will soon get back in business.
To begin, start by turning on the motor of the mill so that it can adjust its speed accordingly. Then line up all of the parts properly and make sure they are securely fastened together. Be careful not to overtighten any of the screws or bolts as this may cause damage to the internal components. After everything is secure, slowly turn off the power until you reach a complete stop.
Finally, check that all of the pieces are still firmly in place before flipping on the switch once again and beginning operations at full capacity. In this way, your electric grain mill will remain well-maintained for many years ahead!
Frequently Asked Questions
How Often Should I Clean My Electric Grain Mill?
When it comes to maintaining and cleaning your electric grain mill, one of the most important questions is how often should you do so? After all, making sure that your mill works efficiently and safely is essential. It’s also important to ensure that your grinding results are consistent. Here we’ll look at the best guidelines for keeping your grain mill in optimal condition.
Regular maintenance will be key when it comes to keeping your machine running smoothly. Cleaning out old grains after each use is a must as this can prevent clogging or jamming which could lead to bigger problems down the line. You should also check for any signs of wear every few weeks – if anything looks suspicious then it’s time for a more thorough inspection. And finally, make sure you give it an occasional wipedown with a damp cloth; this will help keep dust and debris from accumulating inside the machine.
In addition to regular maintenance, there may come occasions where you need to clean the entire unit – such as if you’ve been using different types of grains on a frequent basis. If this happens, start by unplugging the appliance and taking off any removable components like hoppers or filters. These can then be wiped down separately. Once everything has dried thoroughly, reassemble all parts before plugging back into power source. Finally, make sure you run some white rice through it just to get rid of any residue left behind in the internal components; this should take no longer than two minutes but will go a long way towards ensuring better performance over time!
Cleaning and maintaining your electric grain mill doesn’t have to be difficult or time-consuming but doing so regularly will extend its life while improving safety and efficiency levels. Taking these steps now can save you lots of hassle later on down the road!
What Type Of Cleaning Materials Should I Use?
It is important to use the right materials when cleaning an electric grain mill. According to statistics, nearly 90% of people who own a grain mill do not clean it regularly or properly. This can lead to costly repairs and decreased efficiency over time.
When it comes to cleaning your electric grain mill, there are several types of materials you should consider using. For example, a soft cloth dampened with warm water works well for wiping down surfaces and removing dust from hard-to-reach places. Ensure to follow your mill’s specific instruction when using any water.
Once you have gathered your supplies, be sure to take your time while cleaning the machine so that no parts are damaged or broken during the process. Pay special attention to areas where flour buildup is likely, such as around grinding plates and other crevices inside the machine itself. Doing this regularly, at least once every few weeks depending on usage rate, could save you both time and money in the long run by preventing major repairs or replacements due to dirt or debris buildup in critical components of your grain mill.
No matter how often you clean it or what materials you choose to use, regular maintenance on your electric grain mill will ensure its longevity and functionality for years to come!
What Is The Best Way To Store My Electric Grain Mill?
Storing your electric grain mill is an important part of properly maintaining it. When you invest in a high-quality piece of equipment, you want to make sure that it lasts and functions optimally for years to come. To ensure the longevity of your appliance, there are certain steps you should take when storing it away.
When not in use, many people opt to put their electric grain mills inside a storage cabinet or cupboard. This helps keep dust and debris out while also keeping the machine free from any accidental damage. If possible, it’s also beneficial to store your appliance on a shelf rather than directly on the floor. This can help prevent moisture buildup which could lead to rusting or corrosion over time. Additionally, if space allows, consider wrapping up any cords or other accessories with the mill before placing them into the cabinet or cupboard as this will help reduce tangles and clutter down the line.
Just like cleaning materials play an essential role in proper maintenance, so does location! Try avoiding areas such as basements or attics where large temperature fluctuations may occur due to extreme weather conditions. These environments can cause unnecessary wear and tear on both internal and external components of your electric grain mill – leading to costly repairs later on down the road. Instead, choose a spot that is well ventilated but provides some protection from dirt, water and other potential hazards.
Finding the right place for your electric grain mill might seem daunting at first but taking these steps now can save you lots of trouble in the future! Taking care of all aspects of its upkeep – including storage – will go a long way towards ensuring optimal performance for years to come.
How Do I Know When To Replace The Grinding Stones?
It is important to be aware of when it’s time to replace the grinding stones on your electric grain mill. You want to ensure you are getting the best results from your device, and having properly maintained grinding stones can help with that goal. Here are 4 key indicators that will tell you if it’s time for new ones:
- If they appear worn down or have small chips in them
- If they don’t grind grains evenly anymore
- If there is a significant amount of metal shavings coming off during operation
- If the device produces an unusual sound when running
Keeping up regular maintenance on your electric grain mill is essential for optimal performance. Checking the condition of the grinding stones should be part of this routine. Signs like uneven results, excessive noise, and metal shavings can all point towards needing replacements. It may seem intimidating at first but it’s actually quite simple – just measure the size and shape before ordering a new pair online or buying them at a local store!
If done correctly, replacing your grinding stones can lead to better tasting flour products as well as more efficient use of energy and resources. Your efforts will pay off in time as you experience improved flavor profiles from each batch of food items produced using your machine. Taking care of these components regularly will also extend the life span of your appliance so that you get even more out of your investment!
Conclusion
It is important to properly maintain and clean your electric grain mill in order to ensure its longevity. Taking the time for regular cleaning and storage will help you get the most out of this kitchen tool. Think of it like a car, proper maintenance keeps it running smoothly and prevents costly repairs down the road.
To keep your electric grain mill in top condition, be sure to clean it often with food-safe materials. Make sure to use only soft cloths or sponges when wiping surfaces as abrasive scrubbers may scratch delicate parts. Store your electric grain mill in a dry place away from excess moisture so that its interior components don’t become damaged by rust or corrosion over time. Lastly, inspect the grinding stones regularly to make sure they are not worn out and need replacing.
Overall, taking care of an electric grain mill doesn’t have to take up too much of my time but is well worth the effort for delicious freshly milled flour! With just a few simple steps I can enjoy all the benefits this versatile kitchen tool has to offer – both now and into the future.